
Marietta Wood Flooring offers screen and recoat service for hardwood floors in Marietta, GA, serving surrounding cities including Fair Oaks, Holly Springs, Smyrna, Kennesaw and Vinings. After more than 20 years on wood floors, we recommend a recoat whenever a floor still has sound finish and only needs its surface renewed, because it keeps wood on the boards that a full sanding would remove forever.
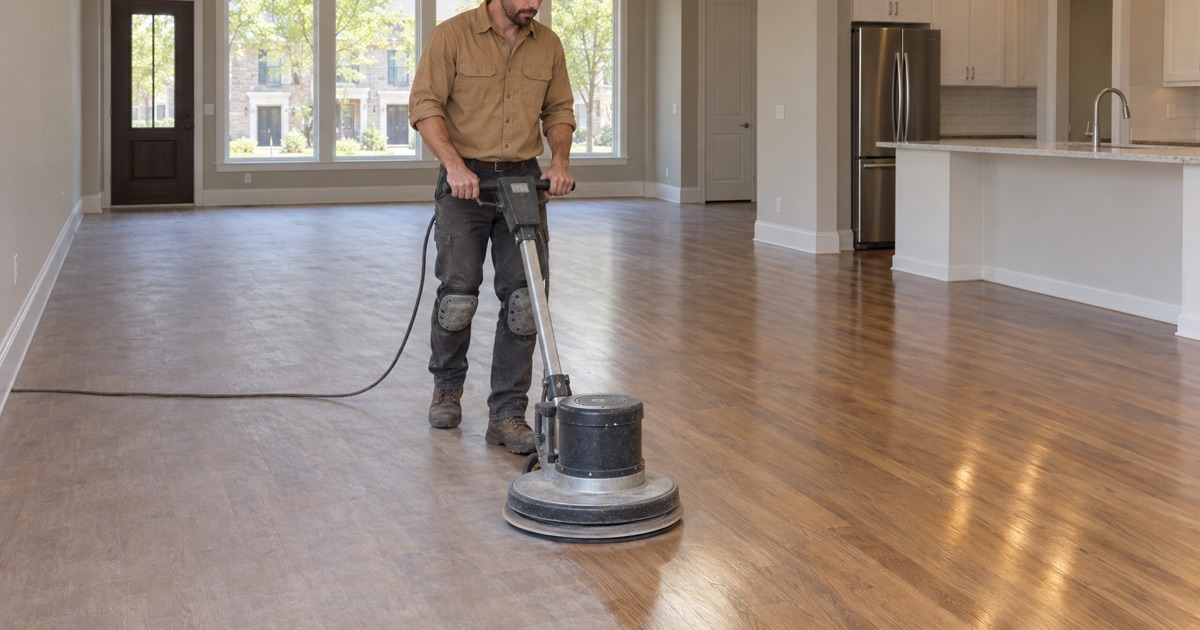
A screen and recoat is the least invasive way to renew a hardwood floor. We abrade the existing finish with a fine screen or pad, clean the floor thoroughly and apply a new topcoat. The floor comes back with a fresh, even sheen, and the light scratches and dull traffic areas in the old finish largely disappear.
The catch is timing. A recoat only works while the wear is still in the finish. Once traffic lanes turn gray and reach bare wood, the floor needs a full sand and refinish, so an honest assessment comes before any quote.
When a Recoat Is the Right Choice
Dull Finish and Surface Scratches
The best candidates are floors that have lost their shine and picked up fine surface scratches from shoes, chairs and pets, but still have finish across every board. Those scratches sit in the top coat, so abrading and recoating it removes most of them. The wood itself has not been touched.
A quick test tells us where the floor stands: a drop of water on a worn area. If it beads, the finish is still there; if it soaks in and darkens the wood, that spot has worn through.
Maintaining a Recent Refinish
Floors refinished several years ago are ideal for a recoat. Adding a fresh coat before the original finish wears through extends the life of the refinish and delays the next full sanding. Many owners plan a recoat as regular maintenance for high-traffic homes.
A recoat also uses the same finish type that is already on the floor, where we can identify it. Matching waterborne over waterborne or oil-modified over oil-modified keeps the color consistent and avoids compatibility problems.
Before Selling or Renting
A recoat is a fast, affordable way to freshen floors before listing a house or between tenants. It makes the floor look cared for without the time and cost of a full refinish, which fits tight listing and turnover schedules.
For rentals, a recoat between leases keeps the finish from wearing through, which protects the wood from the deeper damage that turns a routine turnover into a sanding job. It also fits inside a short vacancy window.
When a Recoat Will Not Work
Gray Traffic Lanes
Where foot traffic has worn through the finish, the exposed wood turns gray and absorbs dirt. A new topcoat over bare, gray wood only seals the discoloration in. Those floors need sanding to fresh wood first.
Sometimes only one area has worn through, such as a kitchen path, while the rest of the house is fine. We explain the options for that case, including sanding the worn area to a natural break and recoating the rest.
Deep Scratches, Dents and Stains
Scratches that cut into the wood, dents, pet urine stains and water stains are below the finish. A recoat does not reach them and may even highlight them under a fresh sheen. Those problems need a full sand, and sometimes board replacement.
A few isolated deep marks do not always rule out a recoat. Where the rest of the floor is sound, some owners accept a handful of visible scratches in exchange for keeping the cost and the wood loss low.
Waxed or Contaminated Floors
Floors that have been waxed with paste wax, or cleaned with products containing silicone or oils, can prevent a new coat from bonding. The new finish peels or fisheyes. We ask about cleaning history and test adhesion, and we recommend a full sand when contamination is likely.
Older homes may also carry shellac under a later coat. Shellac and modern polyurethane do not bond well to each other, so a floor with shellac in its history needs sanding rather than recoating.
How We Screen and Recoat
Cleaning and Abrading
We start by cleaning the floor thoroughly to remove dirt and residue. Then we abrade the finish with a buffer fitted with a fine screen or abrasive pad, which dulls the old finish evenly and gives the new coat something to grip. Edges and corners are abraded by hand.
Furniture is moved out of the rooms being coated and returned only once the finish can take it. Baseboards are protected, and we plan the order of rooms so nobody has to walk across wet finish to get out.
Dust Removal and Tack
After abrading, we vacuum the floor and wipe it with a tack cloth so no dust ends up in the new finish. Dust trapped under a topcoat shows as rough specks, so this step matters as much as the coat itself.
HVAC fans are switched off during coating where practical, because moving air carries dust onto wet finish. We turn them back on once the coat has set to help it dry evenly.
Applying the New Topcoat
We apply the new finish with an applicator, working with the grain and keeping a wet edge to avoid lap marks. Waterborne polyurethane is our usual choice for its fast dry time, low odor and clarity. We can change the sheen level at this step, for example from gloss to satin.
Clear finishes are chosen by their federal VOC category under 40 CFR 59 Subpart D, the varnish category, rather than the floor-coating limit that applies to opaque coatings. That keeps the product matched to the rule written for it.
Engineered and Prefinished Floors
Engineered Wear Layers
On engineered floors with thin wear layers, a recoat is often the only safe way to renew the surface, since full sanding risks breaking through the veneer. A regular recoat protects the wear layer so the floor lasts much longer.
Factory Finishes
Some prefinished floors have hard, factory-applied finishes that resist bonding. Those need special preparation or a bonding product before recoating, and we test before promising a result.
If the test fails, we tell you before any money is spent on a coat that will peel. The alternatives are a full sand where the wear layer allows it, or careful maintenance until replacement makes more sense.
Hardwax Oil Floors
Floors finished with hardwax oil are maintained differently. Instead of a polyurethane topcoat, they take a fresh application of maintenance oil, which can be done room by room or even spot by spot. We identify the finish first, because putting polyurethane over hardwax oil causes adhesion problems.
- 20+ Years on Wood Floors
- Free Written Estimates
- Moisture Checked Before Sanding